COBB Accessport Uninstall/Reinstall Guide for Toyota Tacoma
By Bob Ulrich — videographer and 2024 Tacoma Trailhunter owner behind Portal Hunter
Step-by-step COBB Accessport uninstall and reinstall guide for the 2024 Toyota Tacoma. Photos, menu walkthrough, and troubleshooting tips.
If you own a tuned Tacoma, you’re going to have to pull the tune at some point. Dealer visit. Firmware refresh. Swapping maps. It happens. And if you’ve never done it before, the process looks more intimidating than it is. Here’s everything: hardware, menu navigation, and the full step-by-step for pulling the tune and putting it back.
Understanding the Accessport
COBB’s AP is a handheld flash tool. Plug it into the OBD-II port, it reads your stock ECU and TCU calibrations, stores them, and overwrites them with whatever tune map you pick. “Installing” writes the new calibration. “Uninstalling” puts the factory data back and unpairs the device. Simple as that.
On the 2024+ Tacoma (Trailhunter included), it manages both engine and transmission: shift firmness, skip-shift logic, torque delivery curves. Doesn’t matter if you’re running a COBB shelf tune or a custom file from someone like CAMTuning Performance. Same device, same process.
Hardware Overview
AP V3 is small. Touchscreen, three physical buttons on the front, USB-C on top.
Physical Controls
| Control | Position | What It Does |
|---|---|---|
| ◀ (Back) | Lower-left | Returns to the previous screen or cancels |
| ▶ (Select) | Lower-right | Confirms a choice or enters a submenu |
| ⬟ (Home) | Lower-center | Jumps back to the live gauge display from anywhere |
Swipe to scroll, tap ▶ to confirm, tap ◀ to go back. Home button is your escape hatch. Always drops you back to the real-time gauge view.
Included Cables & Accessories
What’s in the box:
- OBD-II data cable: connects the AP to the truck and powers it
- USB-C cable: for your computer when running Accessport Manager to update firmware or load maps
- CAN bypass cable: only needed during install, not uninstall. More on this below.
No internal battery. AP powers up the second you plug it in through OBD-II. Set up Auto On/Off or it’ll drain your truck battery sitting there overnight.
OBD-II Port Location
On the 4th Gen Tacoma, the OBD-II port is under the dash on the driver’s side, right above the dead pedal. Standard 16-pin diagnostic port. Same one any mechanic plugs into for code reading.
 Driver’s side under-dash area showing the OBD-II port above the dead pedal. Photo: COBB Tuning
Plug the OBD-II cable into this port, connect the opposite end to the base of the AP, and the screen lights up immediately.
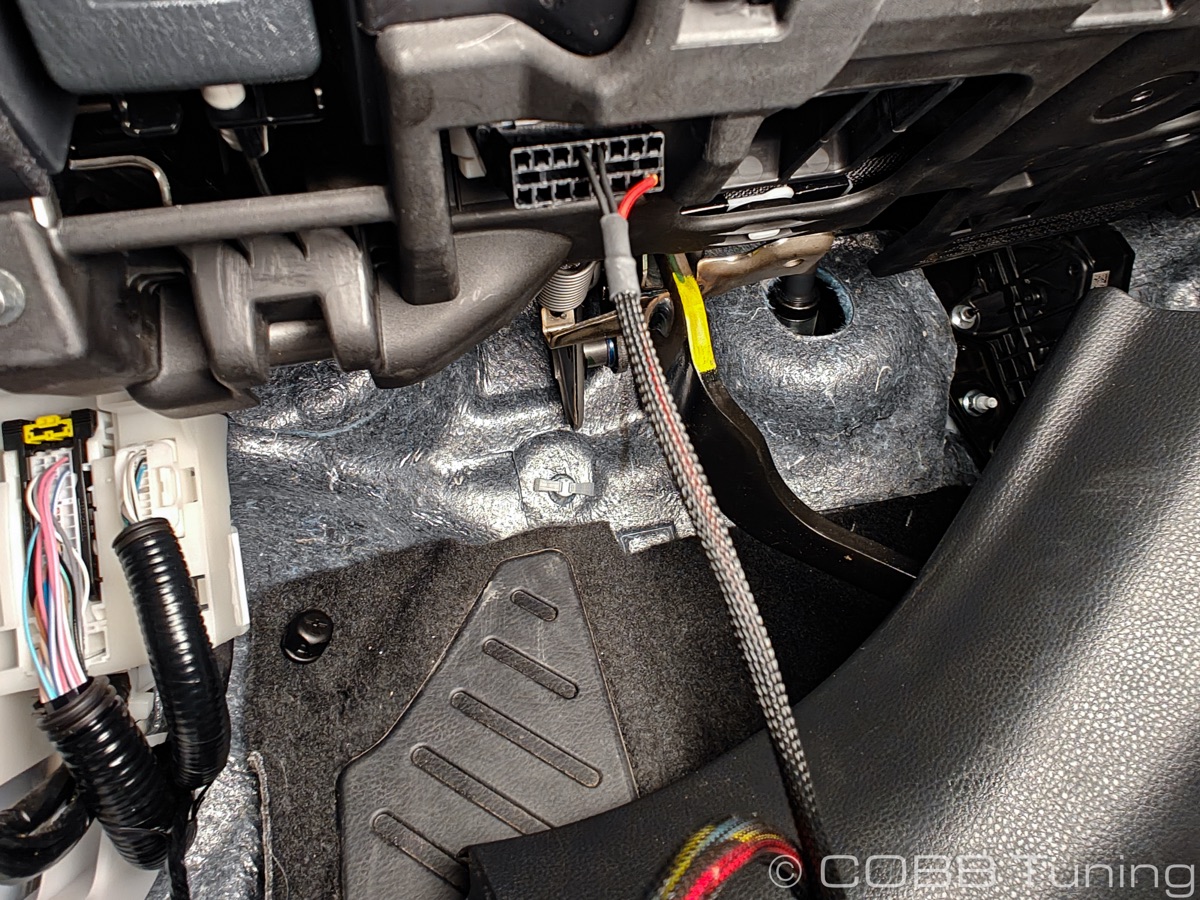
About the CAN bypass cable
This one taps into a connector hidden behind the driver’s kick panel. Gives the AP direct access to the CAN bus during the ECU flash. Only needed for install or reinstall. Never for uninstall.
Accessing the bypass connector on the 4th Gen Tacoma:
- Pull the driver’s side door sill plate. Grip and lift straight up to release the retaining clips.
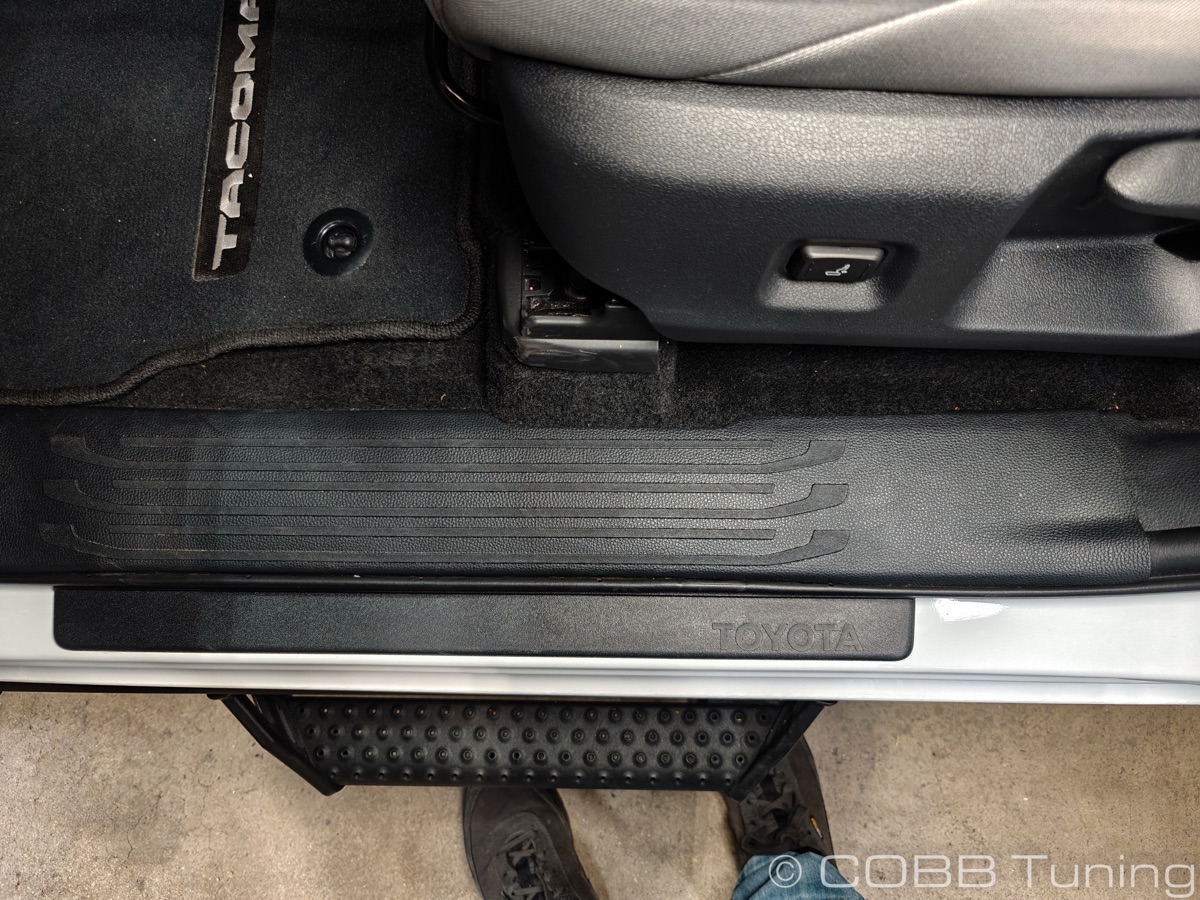 Lift the sill plate straight up. Make sure the trim clips come with it. Photo: COBB Tuning
- Detach the kick panel. Pull it toward you and toward the cab’s center to pop it free.
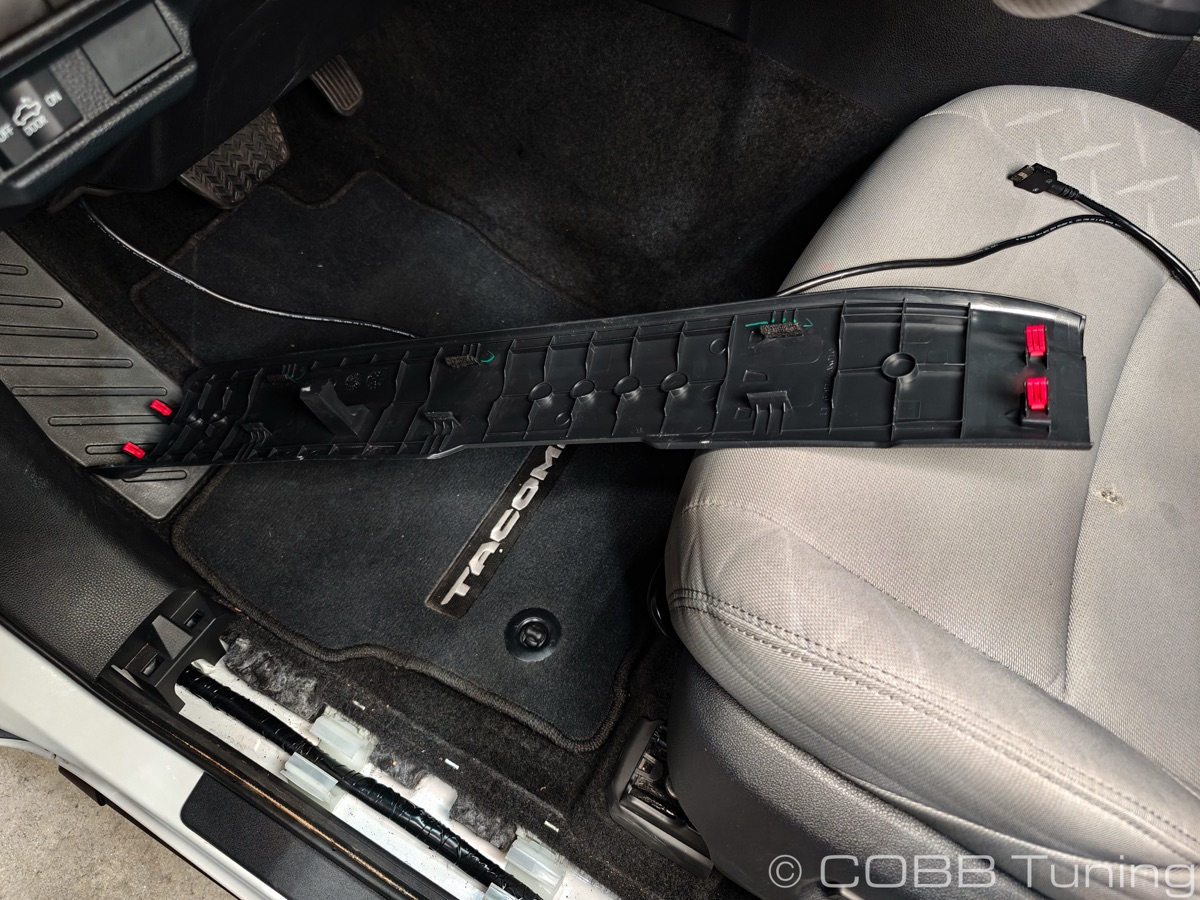 Kick panel detached and set aside. Photo: COBB Tuning
- Find the bypass connector. Small capped plug along the lower-right edge of the exposed area, near the main wiring loom.
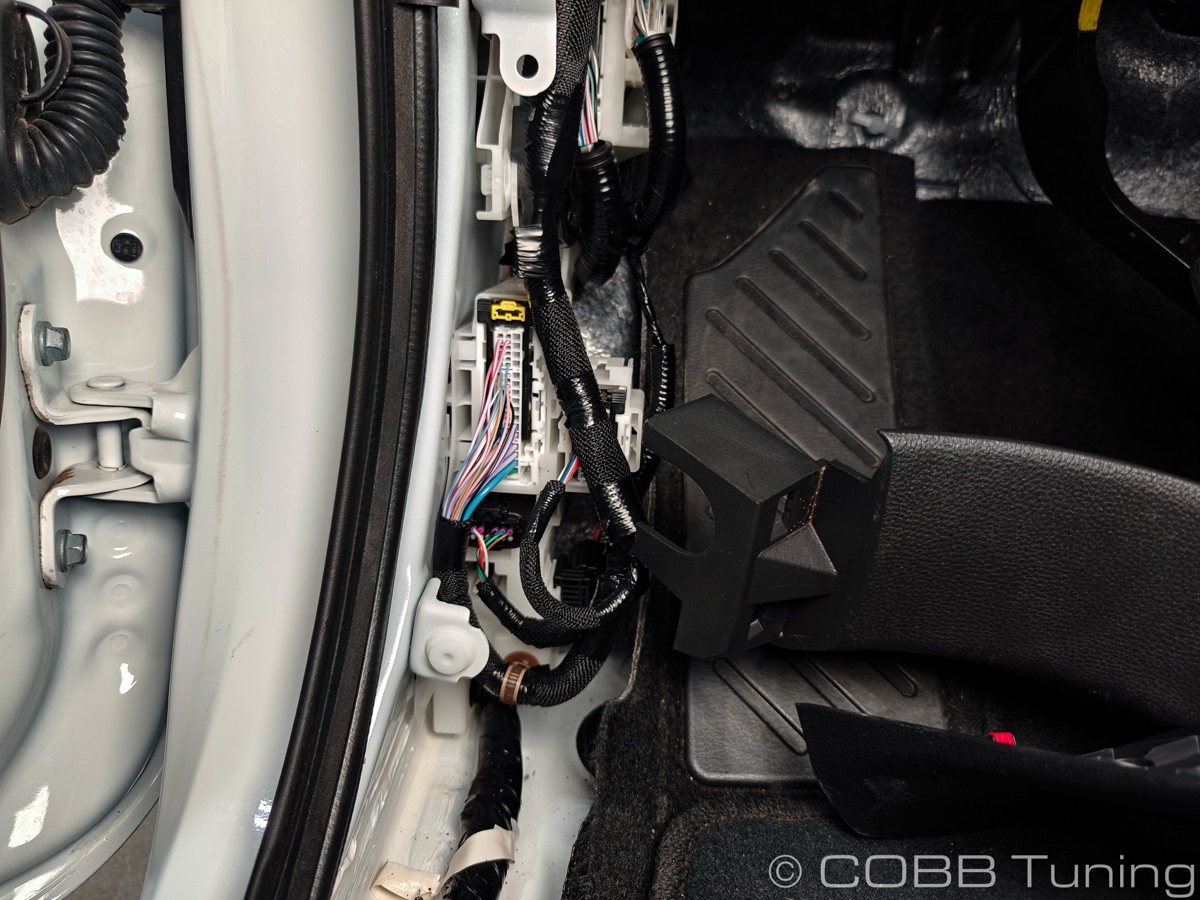 Wiring loom visible behind the kick panel. Bypass connector sits near the bottom edge. Photo: COBB Tuning
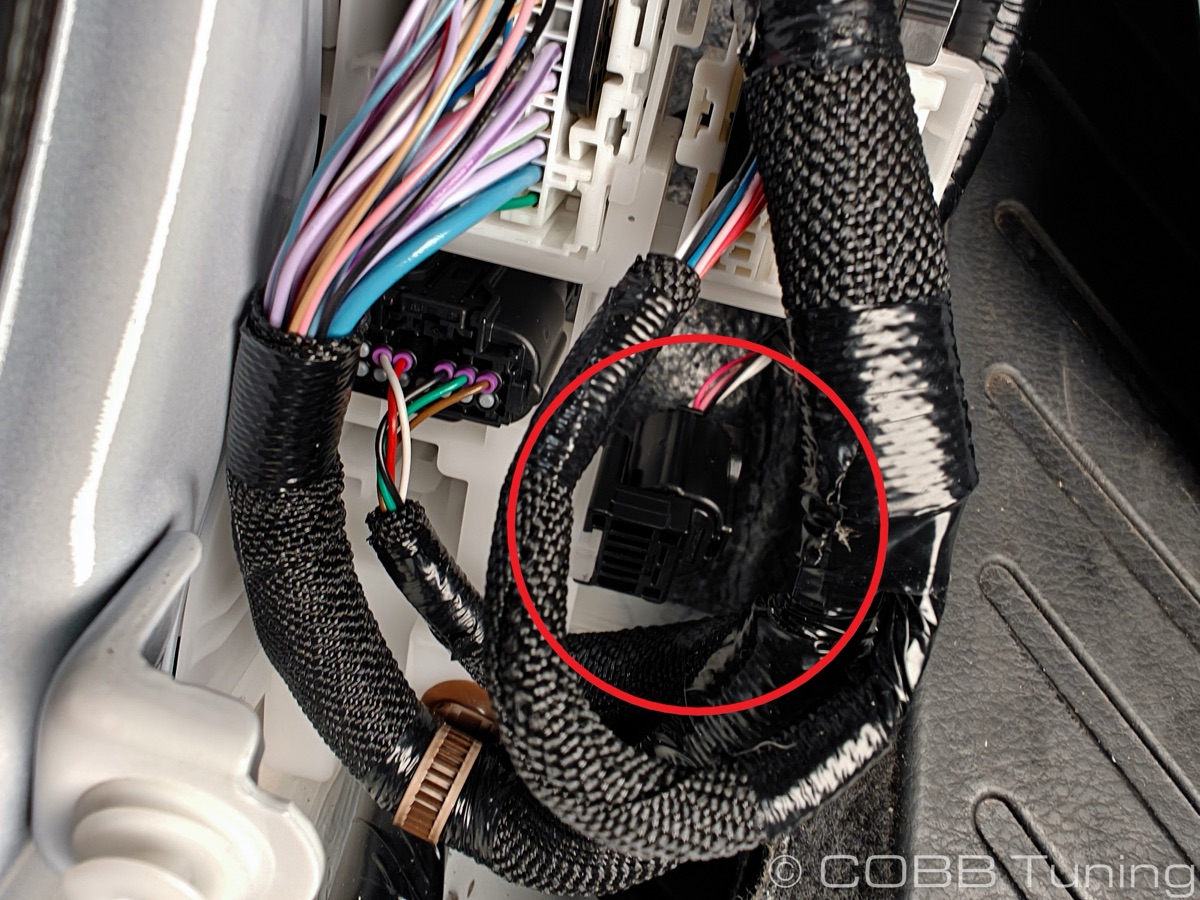 Target connector circled in red. Remove the protective cap and attach the bypass cable here. Photo: COBB Tuning
- Attach the bypass cable. One end goes into that connector, the other routes to the OBD-II assembly.
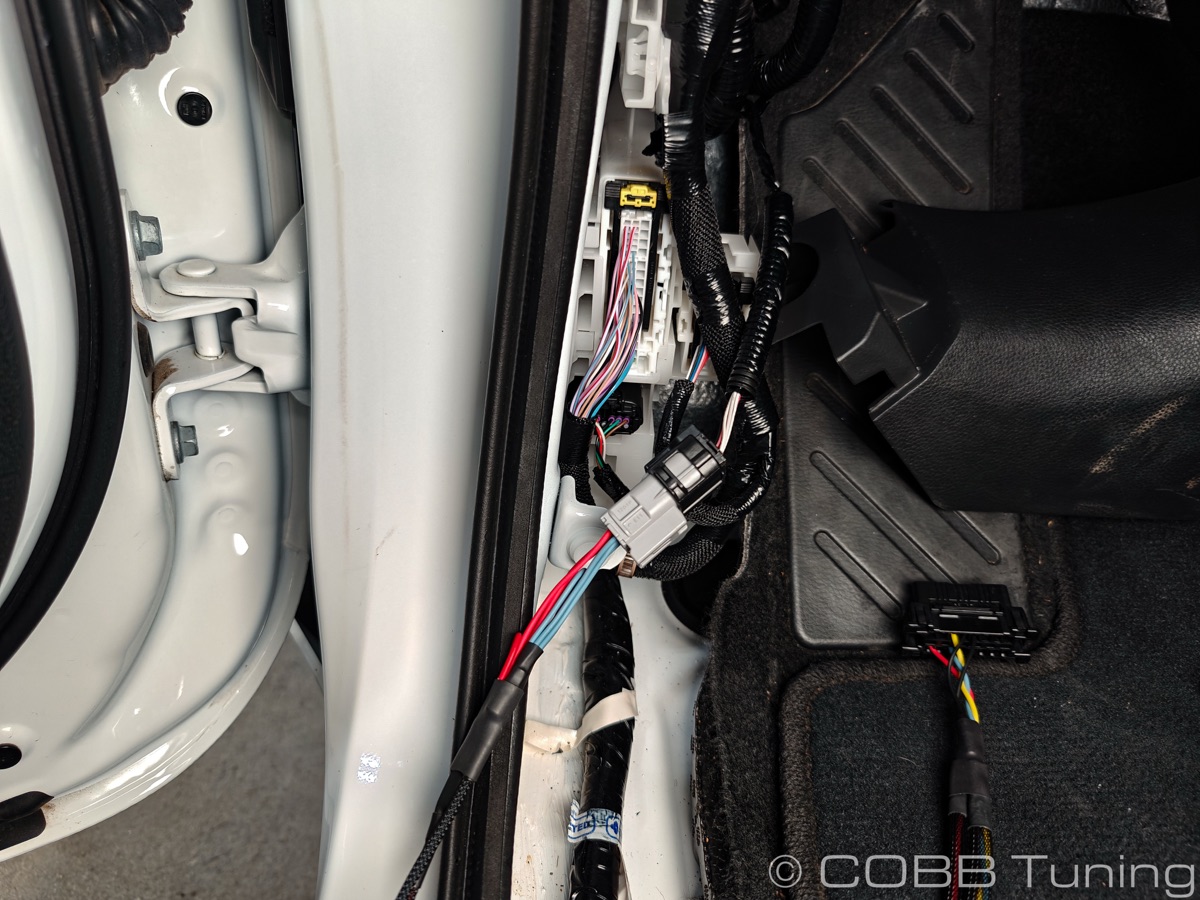 Bypass cable seated and routed. Colored leads connect down to the OBD cable. Photo: COBB Tuning
- Hook up the OBD-II cable and connect the AP.
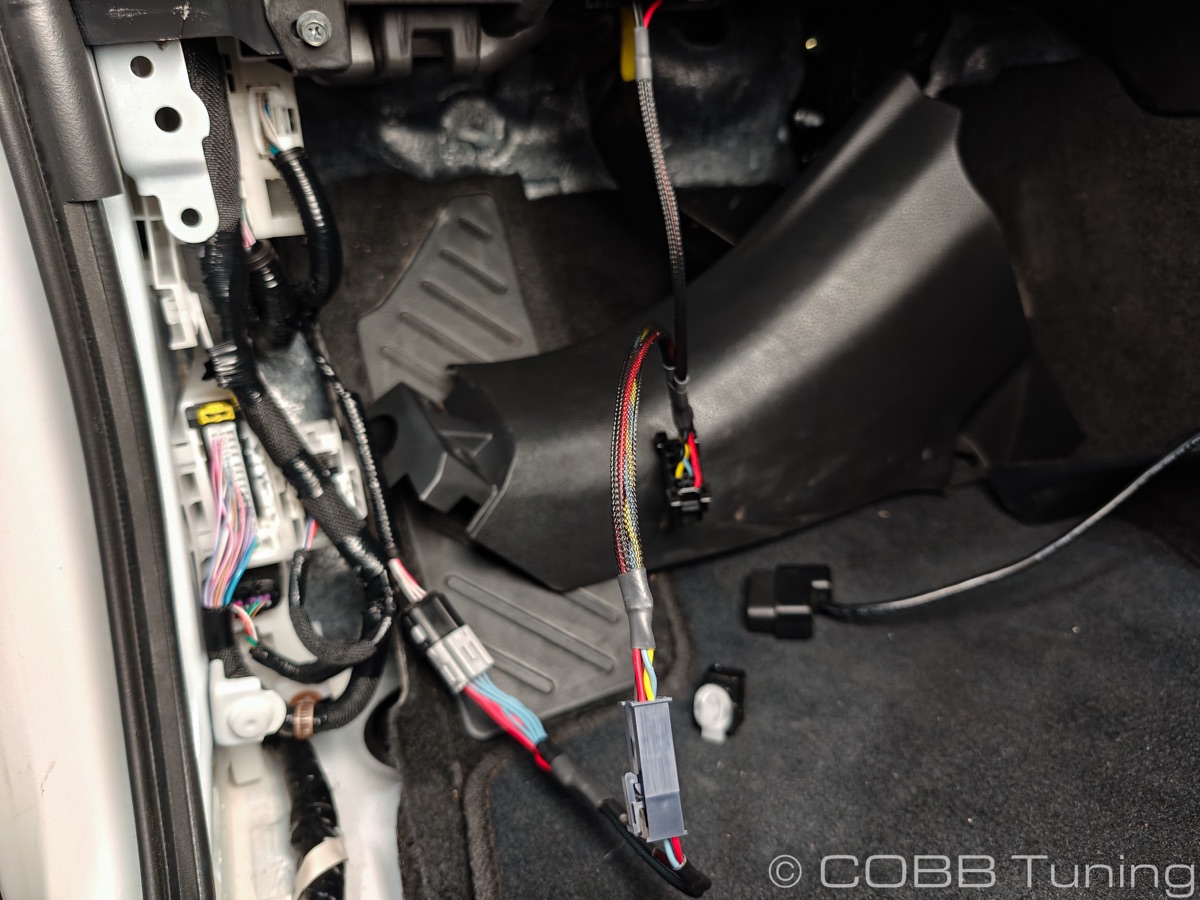 Full assembly in place. Attach the Accessport to the open end of the OBD cable to begin. Photo: COBB Tuning
Detailed walkthrough with additional photos: COBB Toyota Bypass Harness Installation Guide
Navigating the Menus
Once the AP is paired to the truck and powered on, here’s what you get:
| Option | Purpose |
|---|---|
| Gauges | Real-time data readout (boost, RPM, coolant temp, etc.). Default home screen |
| Install | Write a tune map to the ECU/TCU (bypass cable required if not already paired) |
| Uninstall | Write factory calibration back and unpair the AP |
| Maps | View and select from loaded tune files |
| Datalog | Capture real-time engine telemetry for tuner analysis |
| Troublecodes | Pull and clear DTCs (diagnostic trouble codes / check engine lights) |
| System Info | Device firmware version, serial, vehicle details |
| AP Settings | Screen brightness, Auto On/Off, shift light configuration |
If you’re running a CAMTuning remote tune, the two maps you’ll deal with most:
- Stage0, Simulated Stock TCM v100: baseline map for initial pairing and setup
- Your custom CAMTuning file: the daily-driver tune after calibration is complete
Uninstall Before Dealer Service Or Risk Trouble
Here’s what happens if you don’t: dealer pushes a factory ECU update while your tune is still active. It overwrites what the AP is managing. Now your stored stock backup is mismatched, tune maps might need revision from your tuner, and re-pairing gets ugly.
Just pull it before any dealer appointment. Reload when you pick the truck up. Fifteen minutes saves you a multi-day headache.
Removing the Tune (Uninstall)
Gear Needed
- COBB Accessport (currently paired to the truck)
- OBD-II cable
- Ignition on, engine off
- About 15 minutes
No bypass cable required for uninstall.
Procedure
First, plug the AP into your computer via USB and launch Accessport Manager. Grab any firmware updates. Always do this before flashing.
Connect to the OBD-II port and let the AP detect the truck. Hit Uninstall. It pulls the stored factory calibration, flashes it back onto the ECU, resets the TCU to stock, and unpairs itself. Takes 5-10 minutes.
Don’t touch anything while it’s running. No key cycling, no bumping the cable, no killing power. Just let it work.
When you see “Accessport uninstall was successful” on screen, you’re done. Kill the ignition, pull the AP. Truck is stock again.
Tip: stash the AP somewhere secure while the truck is at the shop. I toss mine in the center console.
Reloading the Tune (Reinstall)
Getting the tune back on is basically the original install again. Bit more work because the bypass cable comes back into play.
Procedure
Check your service invoice first. Did the dealer update the ECU? If so, no big deal. AP recognizes new firmware during install and handles it.
Set up the CAN bypass cable again. Same process as before: kick panel off, find the connector, route the cable. COBB’s walkthrough has the full photo sequence.
Connect the AP and hit Install. Pick your tune map. It still has all your files loaded, so just grab the same one you were running. Your CAMTuning stage file, whatever it was.
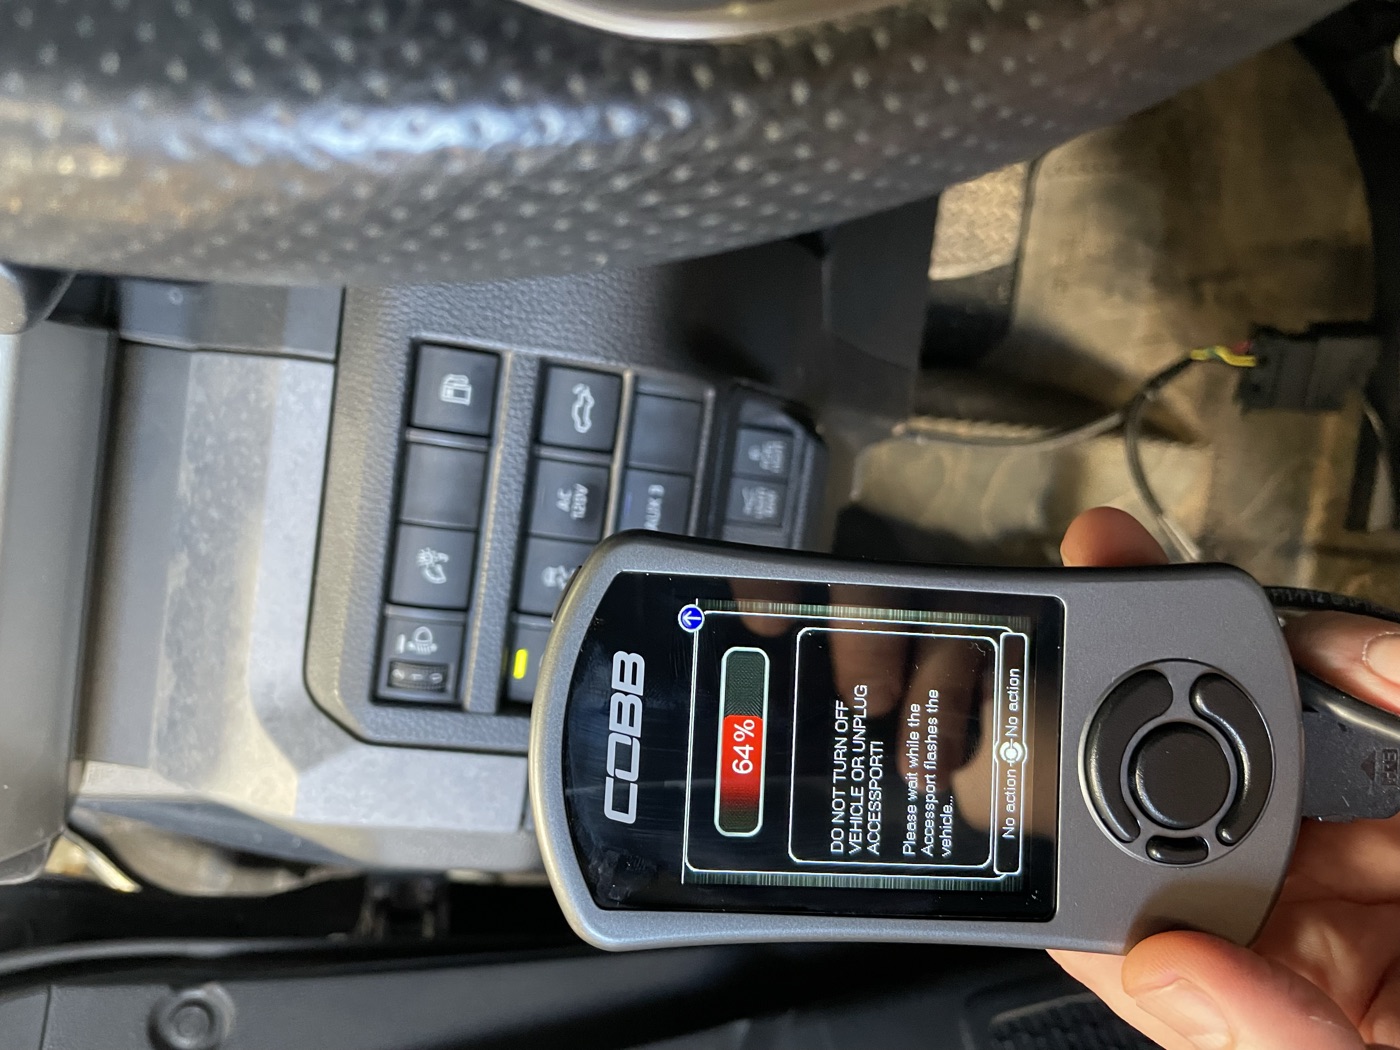
Between flash stages, the AP shows key-off intervals. Do not skip them. Seriously. Each module needs time to reinitialize between writes. Cut them short and you’ll get communication faults.
Screenshot shows the AP at 64% through a flash. See that warning on screen? “DO NOT TURN OFF VEHICLE OR UNPLUG ACCESSPORT.” They mean it.
Once the AP confirms it’s done: ignition off, unplug the AP, pull the bypass cable, and put the factory CAN terminator block back in. Cannot stress this enough. Leave the terminator off and you get phantom dashboard warnings, erratic behavior, and a truck that acts possessed.
Fire it up and let it idle for a minute. You’ll probably see a few dashboard warnings on the first start. Normal. They clear after one or two key cycles. Take a short drive. ECU relearns your throttle inputs and driving style over the next few trips.
Common Problems and Fixes
Dashboard warnings after flashing? Normal. ECU is reconnecting with all the modules. Collision avoidance and driver assist alerts pop up first. Drive for a few minutes and they go away.
CAN errors after reinstall? It’s the terminator block. Almost always. Put it back in, key off for 30 seconds, re-select your map. Done.
Flash dies mid-process? Check your AP firmware in Accessport Manager. Stale firmware causes this more than anything else. Update first, flash second.
Can’t pair after a dealer ECU update? Run the full initial install sequence with the bypass cable. AP grabs the new factory calibration automatically.
Reference Links
- COBB Accessport Manager Download
- COBB Toyota Bypass Harness Installation Guide
- COBB Accessport Auto On/Off Setting
- CAMTuning Performance: Accessport Install/Uninstall Guide
- COBB Toyota Tacoma Landing Page
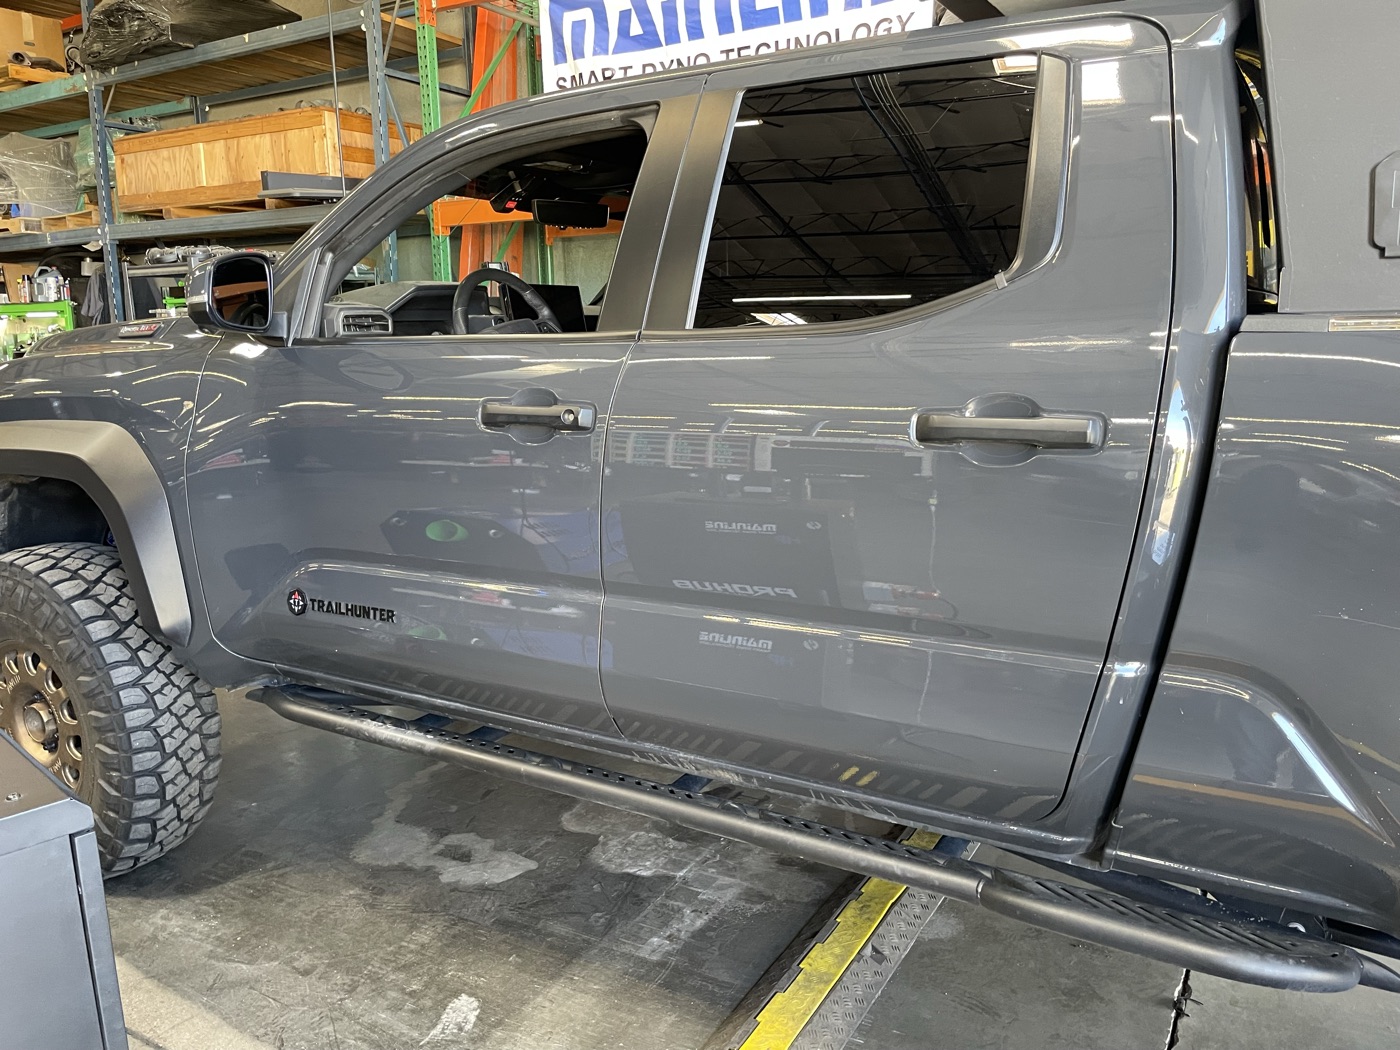
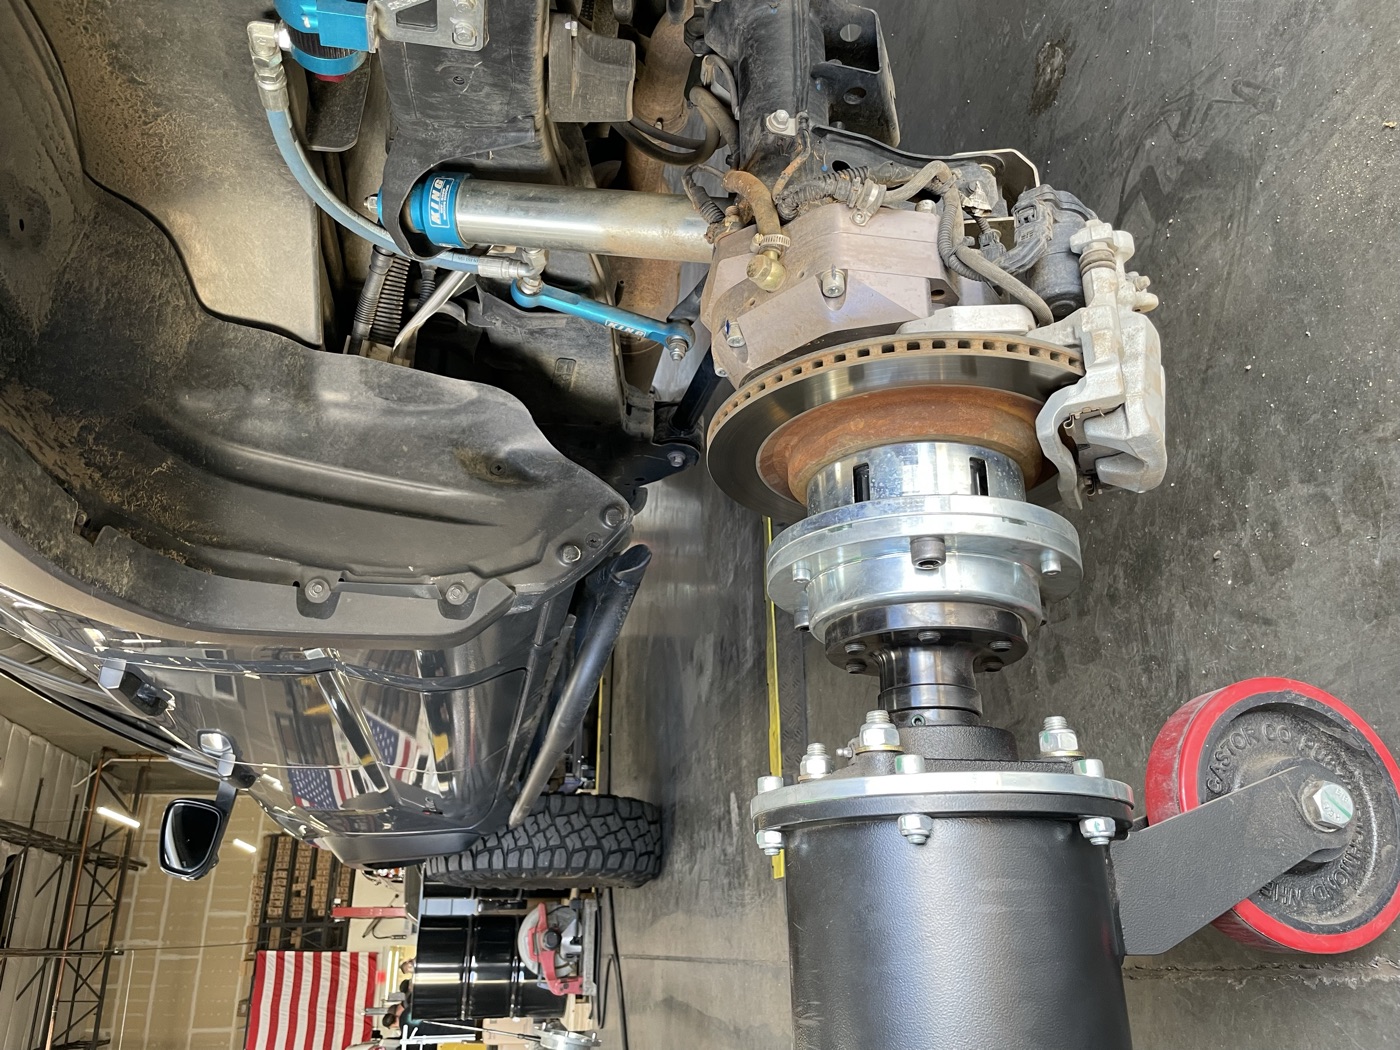
Snapped these photos at the shop with Cameron during the portal axle install, a good excuse to document the AP workflow while everything was torn apart. Check out the full Trailhunter build or the CBI Covert bumper review for more from this truck. Questions? Get in touch.