Why Add Hydraulic Bump Stops to a Live Valve Tacoma?
By Bob Ulrich — videographer and 2024 Tacoma Trailhunter owner behind Portal Hunter
My Trailhunter came with Old Man Emu suspension, and within the first six months I’d blown through the shock shaft bushings. It’s safe to say I’m probably not Toyota’s target audience for a truck that many owners would leave mostly stock.
It didn’t take long to start changing the suspension to match my driving style: fast and hard. That runs against the slow-and-heavy approach a lot of overlanders seem to prefer these days.
I quickly moved to Kings, custom-valved by Arizona Chassis Engineering, and eventually the FOX 3.2 Live Valve system. Tyler has been involved in the custom fabrication and build engineering from the start. This time, we focused on what happens when the suspension runs out of room.
My first-generation Perry Parts rear bump stops were harsh. They kept the truck from completely bottoming out, but I wanted more progression as the suspension compressed.
That was only in the rear. Up front, my truck didn’t have a separate frame-mounted bump stop, unless you count the internal bump zones built into some shocks. With faster desert running, ramping over terrain, and small jumps in mind, we went with FOX hydraulic bump stops front and rear.
From OME to Live Valve
Those custom-valved Kings performed well on my truck. What kept me looking was how differently I use the Tacoma. Desert driving, crawling, highway miles, and getting the kids to practice all ask something different of the suspension.
With the Kings, changing the compression adjustment meant getting out and turning the reservoir adjusters. FOX offered the ability to adapt compression while I drove. SDHQ installed the 3.2 Live Valve system, and I wrote about the difference after the first 500 miles.
I’ve kept working on the rest of the setup too. Eibach front springs and Dobinsons rear coils are now part of it, along with the portals and 74Weld rear links. You can follow the current combination on the build page. The final piece of this suspension setup was getting the bump stops dialed so we could feel comfortable pushing the truck hard.
Where the rear fell short
Out back, I wanted more help as the suspension approached full compression. When the first-generation Perry Parts stops engaged, they were very harsh, with nowhere near the progression of these FOX hydraulic stops.
For me, they were mostly there to prevent complete bottom-out. I wanted something that could do more to manage the last part of compression as the truck hit harder terrain.
I’m talking about the first-generation Perry Parts bumps I had on this truck. I haven’t evaluated their later designs here.
Building the mounts
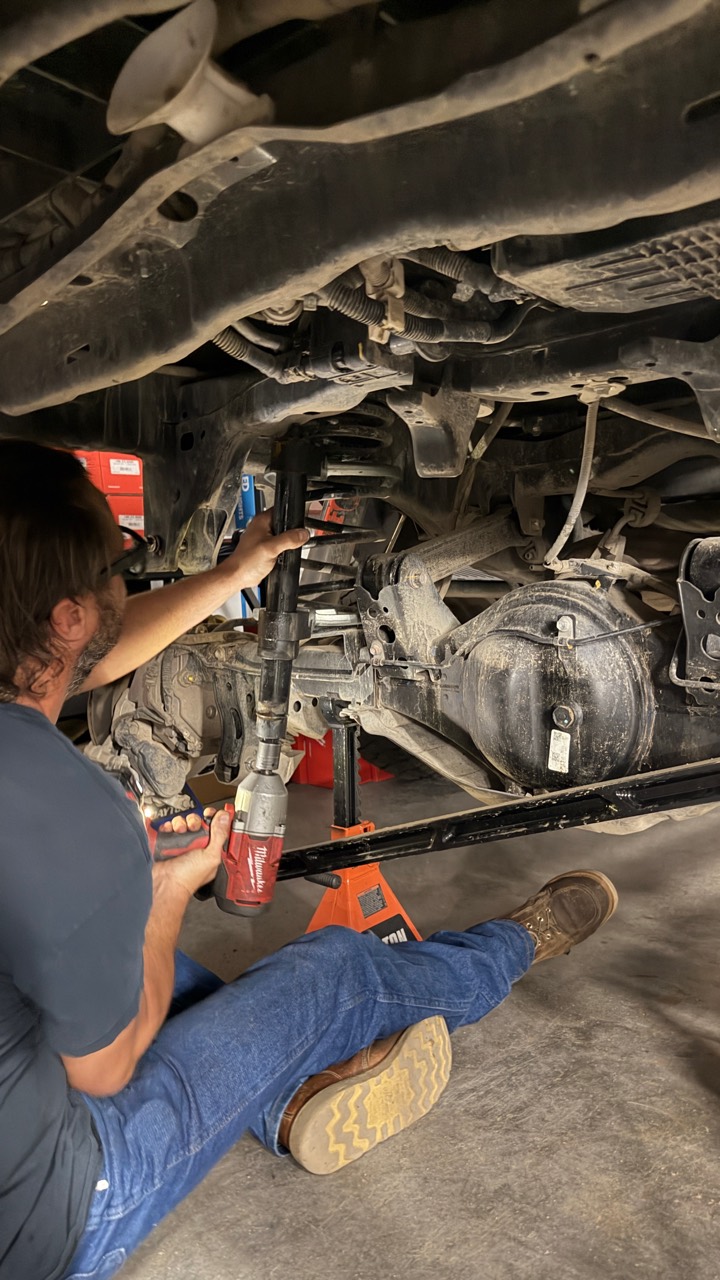
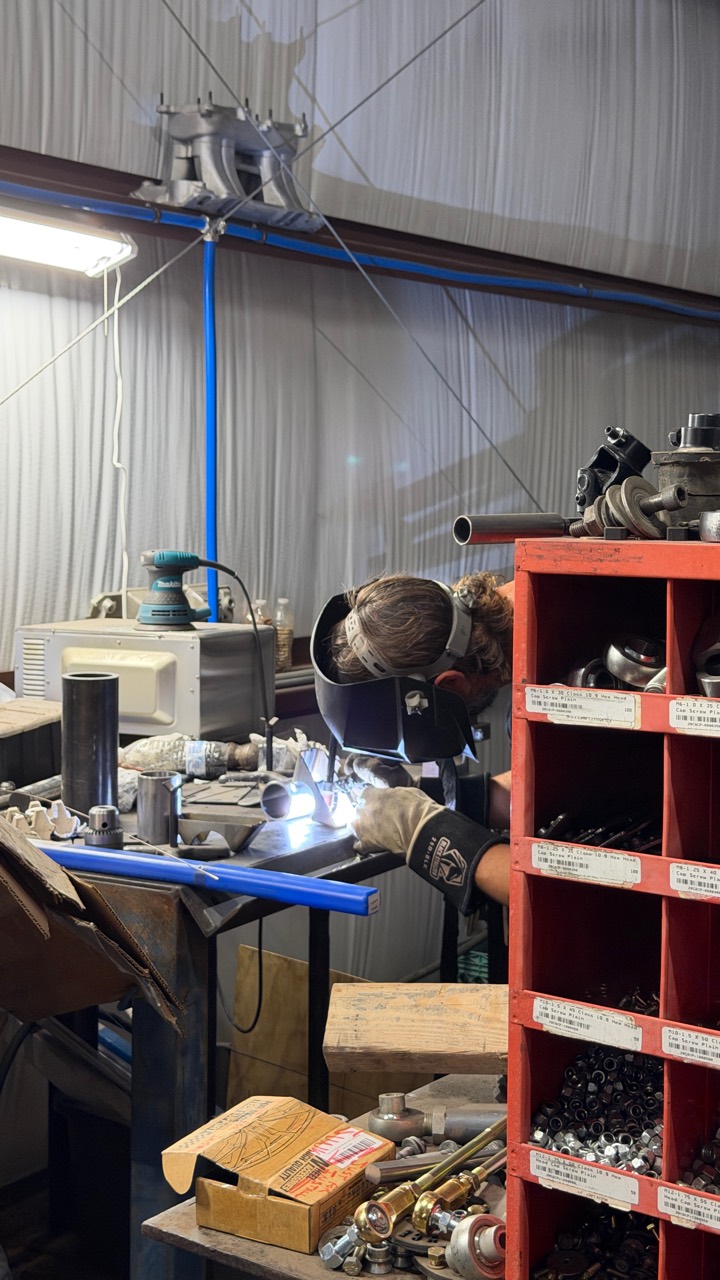
We fabricated the front and rear mounts and the surfaces the pads land on, working around the suspension already in place.
I haven’t seen another fourth-generation Tacoma with this particular custom front-and-rear FOX IFP bump-stop setup alongside 3.2 Live Valve.
Adding IFP damping
FOX’s Live Valve system combines internal bypass shocks with electronically adjusted compression damping. Internal bypass provides position-sensitive damping within the shock; Live Valve changes compression response as conditions change.
Separate hydraulic bump stops supplement that system near full compression. They engage through physical contact with their strike surfaces and operate independently of the Live Valve electronics.
IFP means internal floating piston. Inside these bump stops, it separates the oil from the nitrogen gas. FOX describes that separation as a way to prevent cavitation and bucking. A negative coil spring softens initial contact and top-out, while shim valving provides velocity-sensitive damping. Those details come from FOX’s 2.0 IFP product specifications.
Mounting height determines when the bump stop starts engaging. Its threaded body allows that position to be adjusted. That gives us another adjustment to work with alongside the shocks.
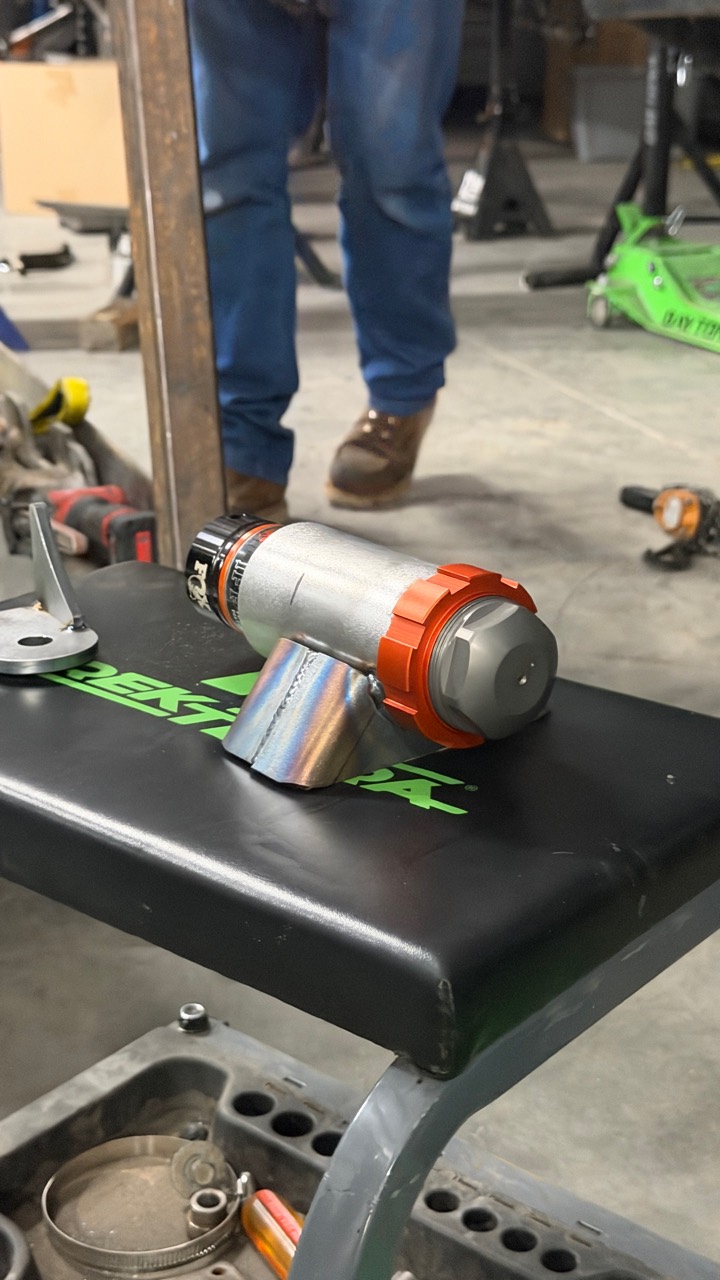
I used FOX Universal Short Gen2 2.0 IFP bump stops, part 983-02-170, at the front and rear. Poly Performance lists them with nominal 2-inch travel and 10-inch extended length, sold individually with a threaded weld-in mounting can.
For anyone comparing dimensions, Poly’s specification table gives 1.854 inches of stroke, 10.037 inches extended, and 8.183 inches compressed.
Rear mounting and contact
We mounted the rear holders to the frame above the axle, with custom strike surfaces underneath. You can see how they line up in the fabrication photo, before the bump stop goes into the holder.
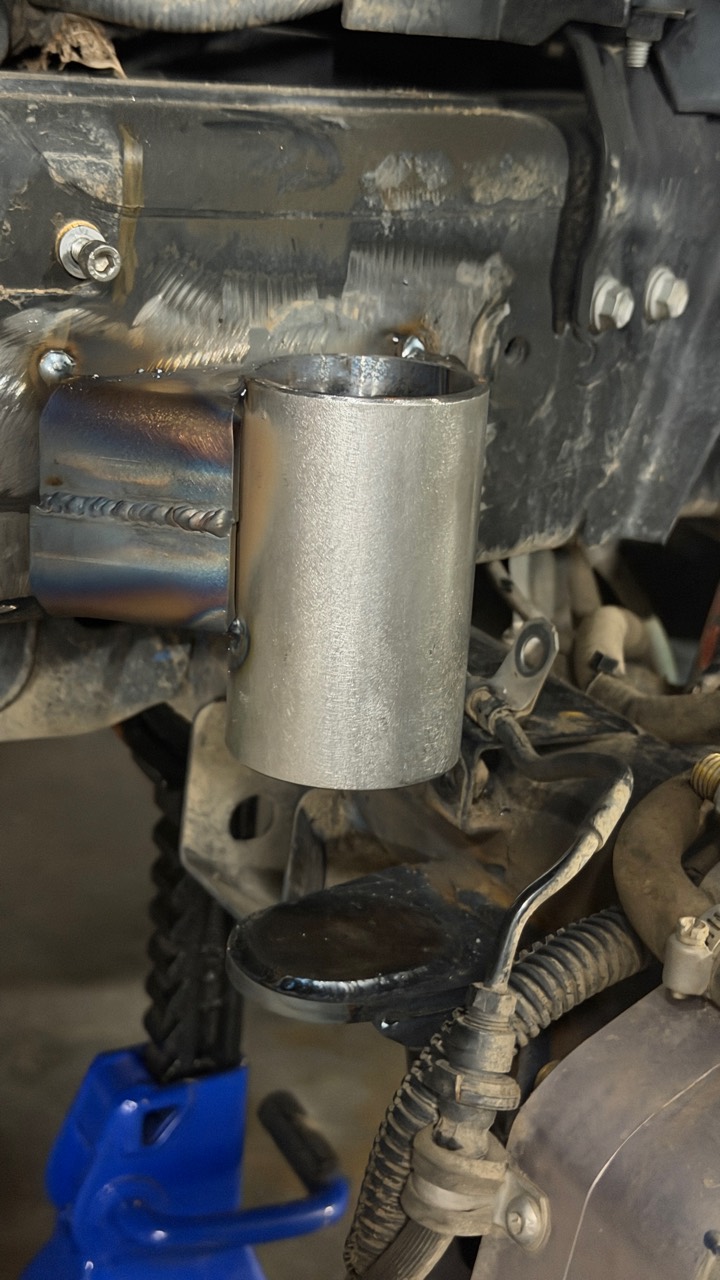
Once it’s installed, the hydraulic bump sits beside the FOX rear shock. Live Valve stays in place, with the separate bump stop taking on work near the end of compression.
FOX’s installation guide requires full-bump positioning that prevents the shock or another suspension component from becoming the travel stop. That requirement helps explain why this job involves suspension geometry as well as welding.
Fitting the front
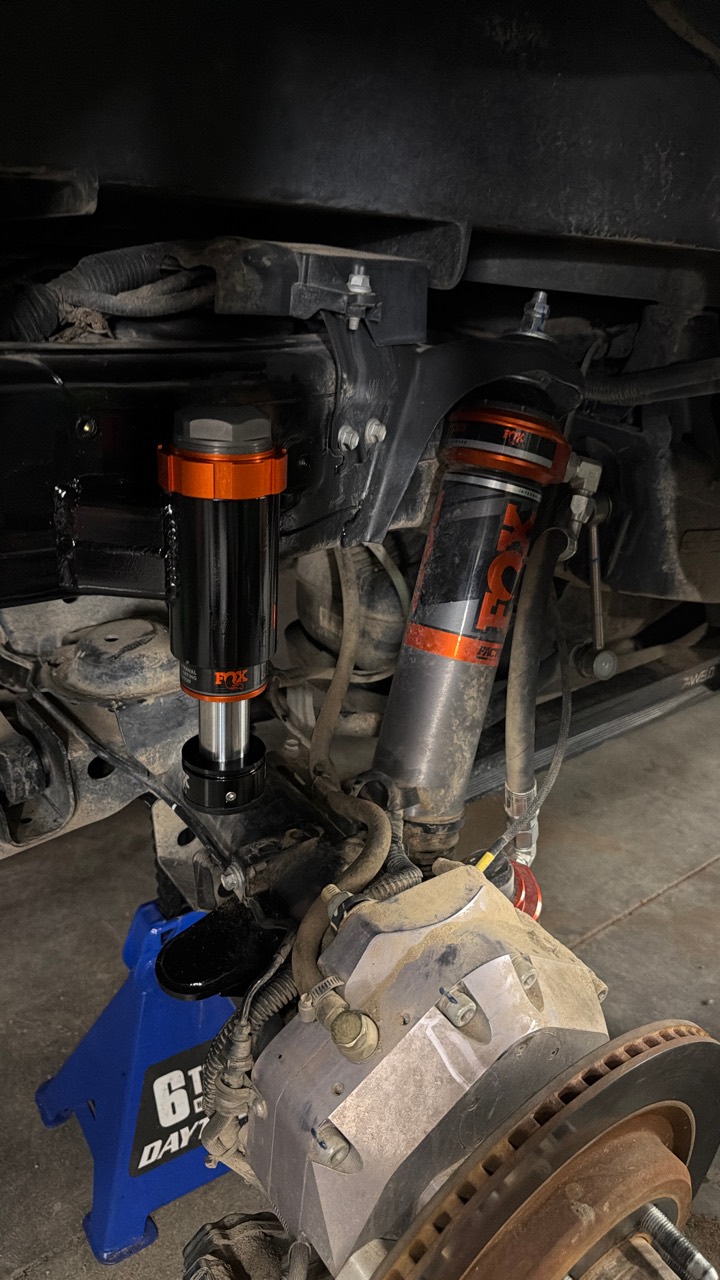
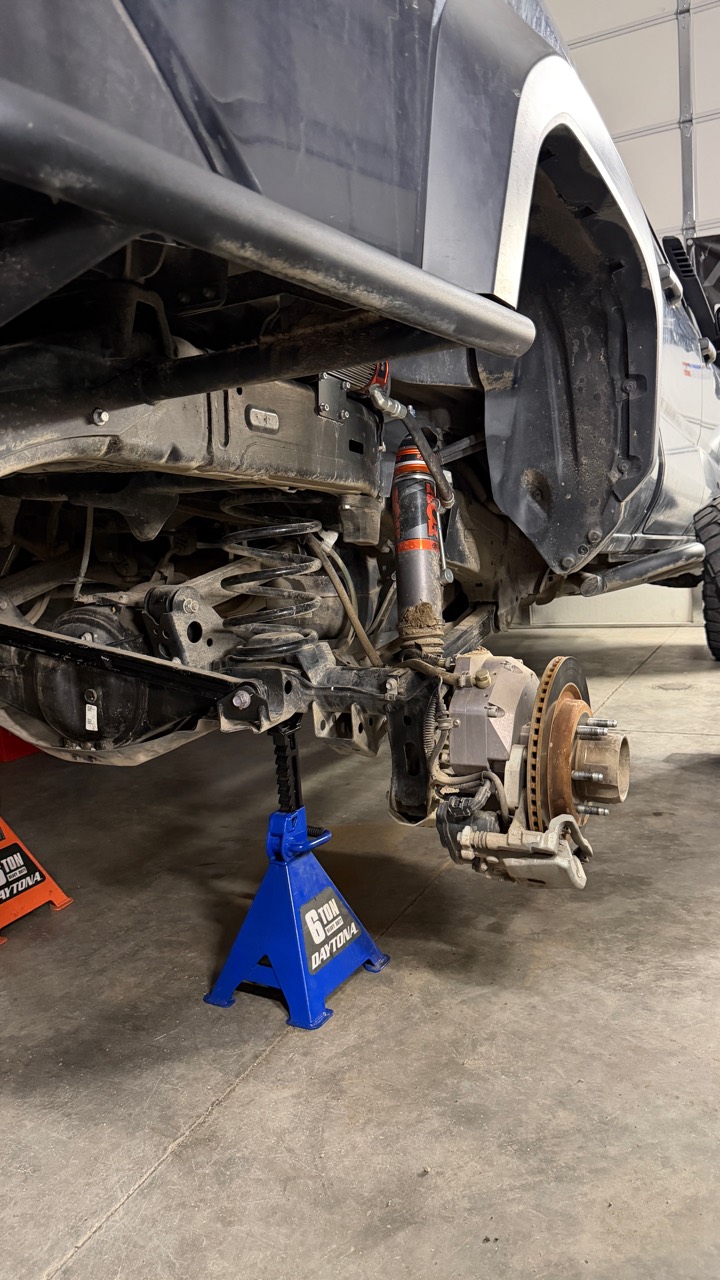
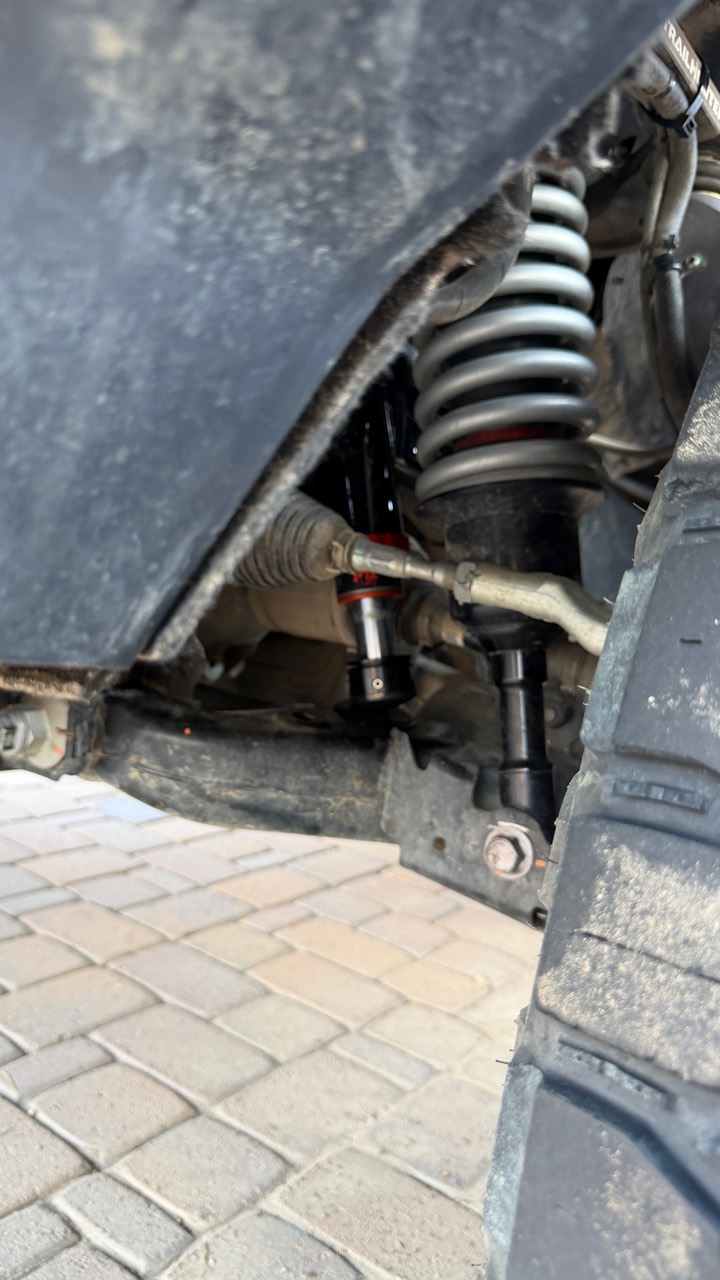
Up front, we had to make room. Steering hardware, CV axles, control arms, and coilovers were already sharing a tight space. Fitting the bump-stop holder meant cutting a notch in the frame so we could tuck it into position.
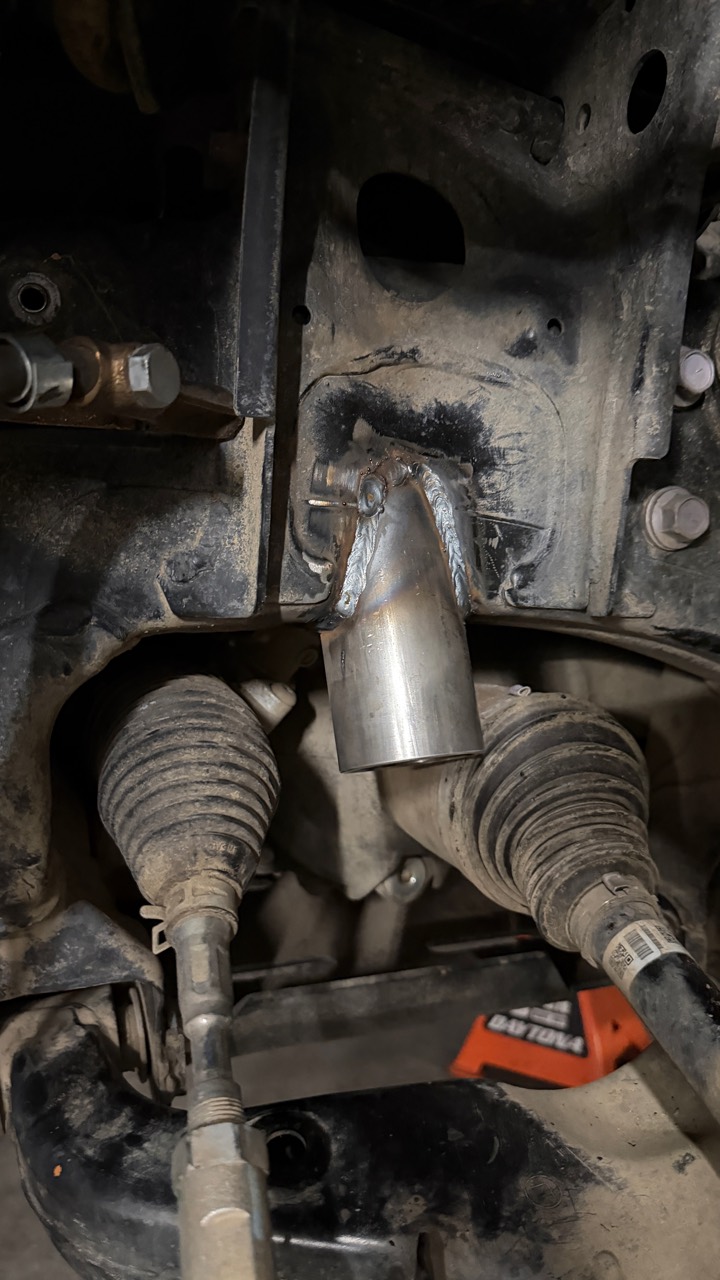
We also added steel to the factory lower control arm to create the contact patch for the bump stop. That gives the FOX pad a surface to land on, but the arm underneath is still OEM.
For what I’m doing now, I expect this setup to work well for a while. With enough force, though, denting the factory lower control arm is still a possibility. That’s something I’ll be watching as we put more time on it.
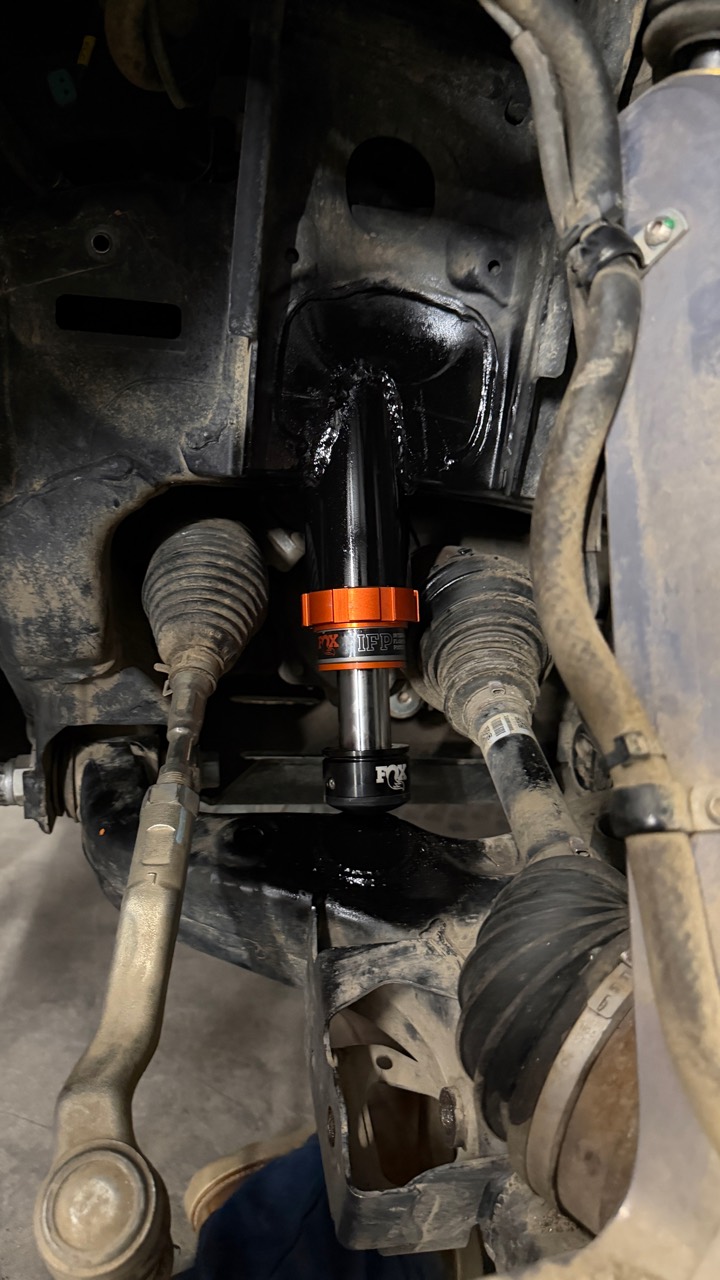
For now, I’m sticking with the factory arms. Something like TOTAL CHAOS lower control arms could be a future step for additional strength. We’d still need to check how they work with this truck’s portals and custom bump-stop placement before making that change. Time will tell whether I need to go there.
With the wheel back on, you can see how much hardware is sharing that space. We tucked the bump stop beside the coilover, above its landing surface on the control arm.
See the difference in slow motion
Words like “progressive” only go so far, so I built a physics simulation of this truck and ran the old setup against the new one over the same jump and the same whoops. Top row has no front stop and the first-generation rubber stops in the rear; bottom row has the FOX hydraulic stops at both ends. Each shock gets a live force bar, and the front is where the gap is widest: with nothing else to end the stroke, the coilover used to absorb the whole landing.
Watch the before-and-after in slow motion, or drive the full simulator with your own speed, terrain, and bed load. Every dimension in it is either a published spec or flagged as an estimate you can edit.
What this cost
All in, I paid about $3,200 for the front and rear bump-stop setup. Roughly $1,600 went to parts and another $1,600 to fabrication and labor at Arizona Chassis Engineering.
Those are my full-price costs, with no discounts on either side. If you’re considering something similar, they give you a starting point for your budget. Pricing will vary depending on your area and who’s doing the work.
Next stop: Cinders, October 1–3
After the fabrication, we went out into the desert near the shop and drove the truck hard. We confirmed the bump stops were engaging at both the front and rear. These FOX bumps feel much more progressive than the first-generation Perry Parts stops I had before.
Cinders will be the true test. We’re heading out October 1–3, 2026, for the meetup and some extreme testing. We’ll be paying attention to how the rear recovers after a hit and how the truck settles after a landing. Up front, we want to see how those factory arms hold up.
Keep an eye on @portal.hunter on Instagram for pictures and videos from the Cinders meetup.